How to Change Theme Name in WordPress or details, or migrate to a new one, is a common and mostly asked question we often hear. And WP has some pure way for users to change the theme images instantly, names, or items. But if you don’t want to lose your data or traffic, it would be best to keep some things in mind for change.
So, please don’t be anxious but have patience. Because the process is super easy, all you have to do is do it slowly but properly. Cause you’re going to work both on your hosting server control panel or cPanel and wp-admin dashboard.
Without more delay, let’s start with how to do it:
How to Change WordPress Theme Name via wp-admin
You can change everything after going to your Dashboard —> Appearance —> Editor. Then you’re taken to a new page where you can see the options to change name, descriptions inside style.css, and so on. So, make the change and click the button named “Update File.”
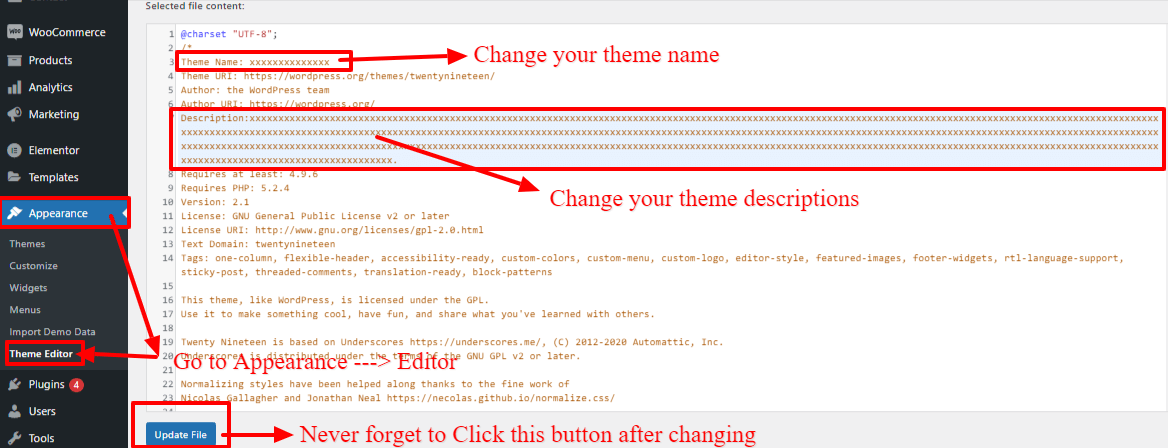
After that, navigate your Dashboard —> Appearance —> Themes. Now activate the template under the new name, and your every detail will change.

But the best practice is to work with FTP Client or cPanel file manager. And we’re going to use the standard File manager method. So, let’s learn:
Update with cPanel:
To work with cPanel, go to your /wp-content/themes, and there you’ll see your theme folder. So, change it first.

After that, open the folder you renamed and find for style.css, then click to open. And when you open Style.CSS, you’ll see the options to change name, descriptions, and so on. So, make the change and click the button named “Save.”
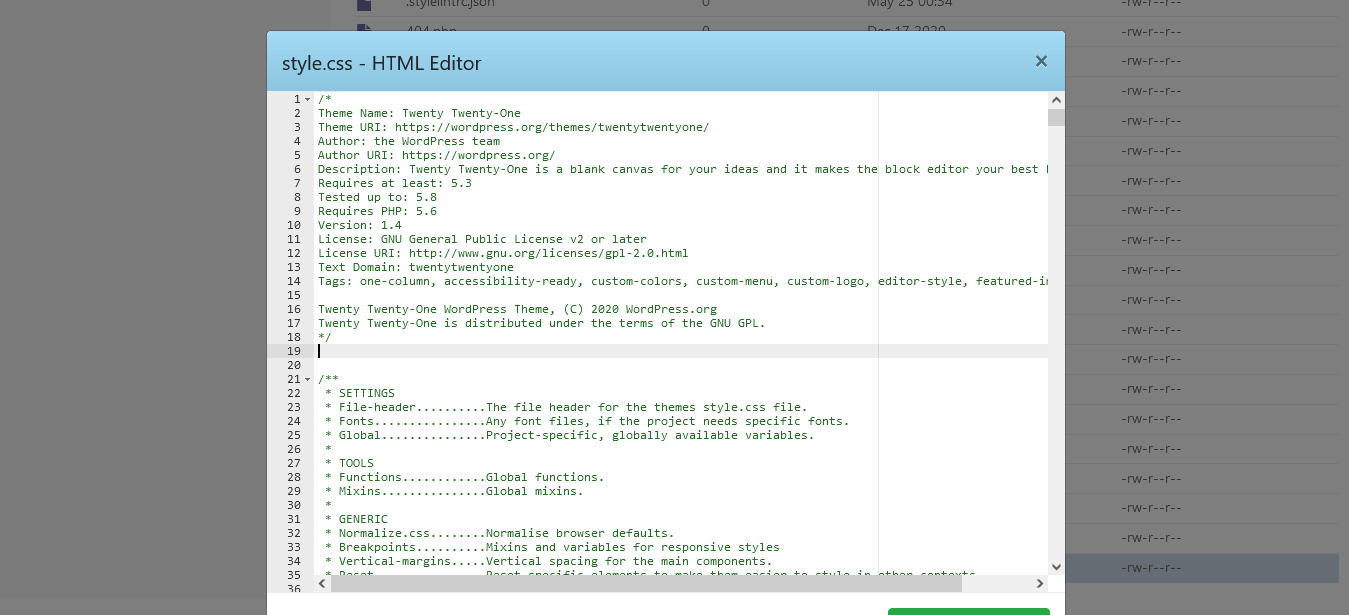
And that’s it, your theme name, details, and so on are changed.
How to Change Theme Image:
To change the theme image, you’ve only one way. And that is with the cPanel file manager. So, run for /wp-content/themes —> theme folder. So, open the folder and search for screenshots.png. Now, replace the image with an updated image.
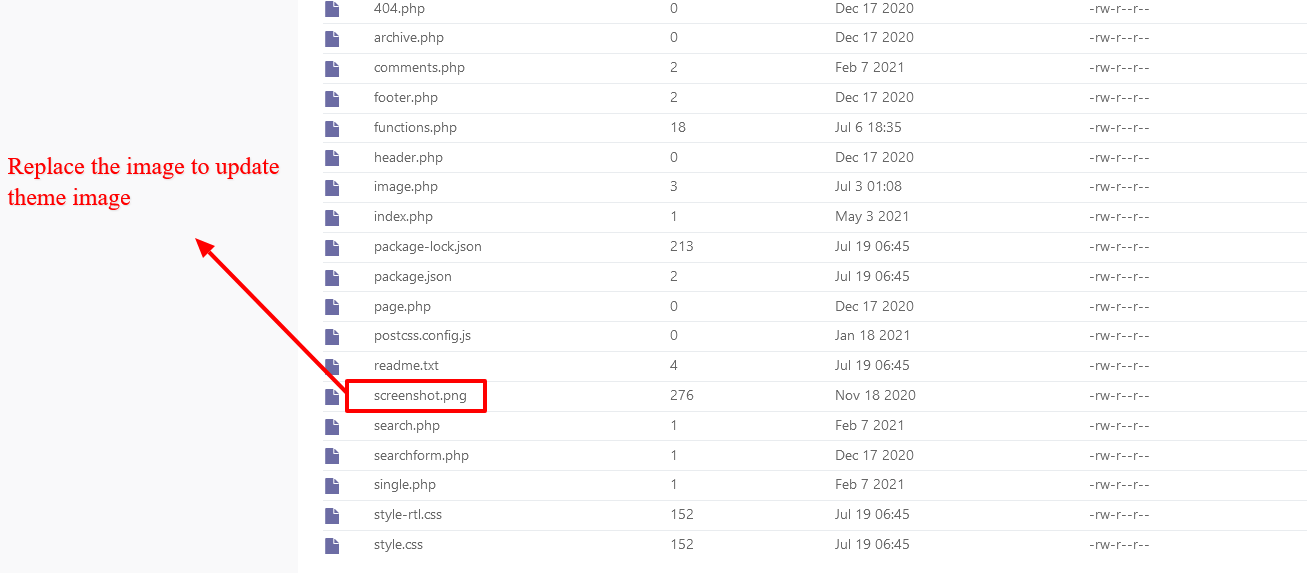
Congratulations! You’ve done changing your theme name, details, and images.
But now, here is some more important info that can also help you deliver what your business is for! Mainly, we’re talking about your Logo, Favicon, and Google fonts. If you set or customize these things properly, it’ll clearly describe your business for users.
So, first thing first, let’s begin with the Logo, how you’ll change or add it:
How To Update Logo, Site Title, Tagline:
If you have a logo to set or replace with a customized one that tells what’s your site is for. No problem, you can do it easily.
Several top rating free themes have the option for image upload functionality. But if you can’t find it for your site, No problem, work out the below method:
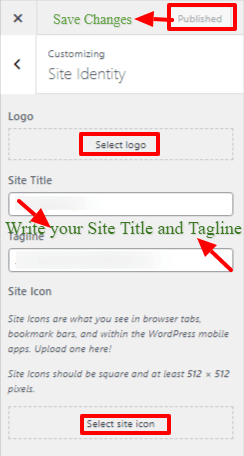
- Open your WP Dashboard —> Appearance —> Customize —> Site Identity.
- Then, you’ll go to a page where you’ll see the Logo, Site Title, Tagline, and Site Icon options with their respective boxes.
- So, first, click on the Select Logo option, and a popup window will show where you’ll see a Select Files option.
- Click to choose the file from your computer, then double hit it to add.
- After that, on the Site Title and Tagline option, you’ve to write your Site Title and Tagline.
- And for the Site Icon option, you’ve to do a similar process like making your Logo.
- Hit Preview options to view how its looks on your site.
- Finally, hit the Publish button to save changes.
Add Google Fonts in any WordPress Theme:
If you search online, you’ll get thousands of plugins to do it. But Free Easy Google Fonts plugin is one of the best and most prominent options to use. It goes with any WordPress template and allows you to pick from the over 600+ free fonts which Google Fonts grants.
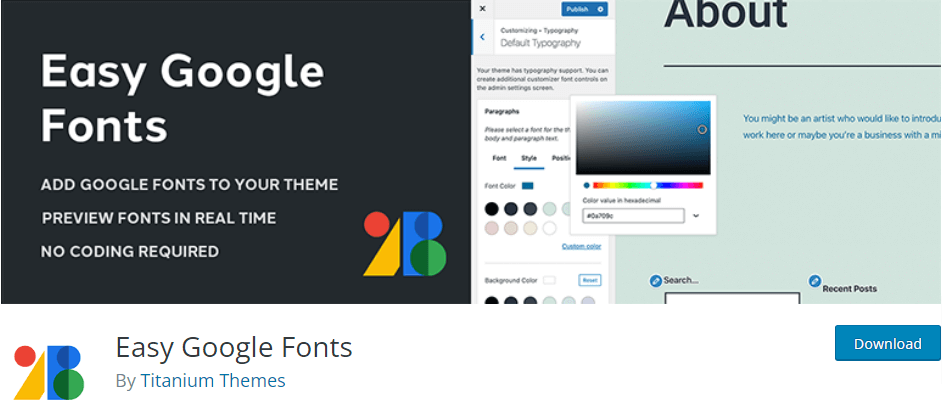
Now, let’s learn how you’ll install, activate, choose, use, and edit this plugin:
1. Install Then Activate:
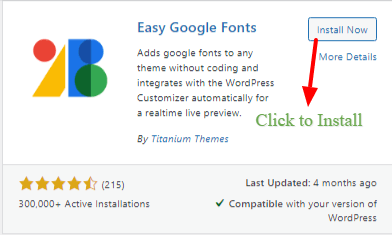
To install and activate the plugin, you first have to go to your Dashboard —> Plugins —> Add New and seek Easy Google Fonts. Then, you’ll find your plugin with a button named “Install Now.” So, hit it to install.
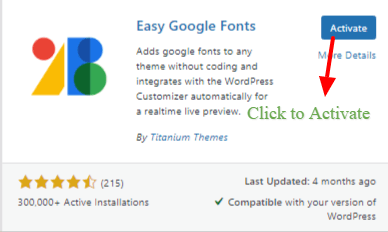
After completing the installation, you’ll see an activate button appear. So, click the button to activate the plugin.
2. Choose Then Use:
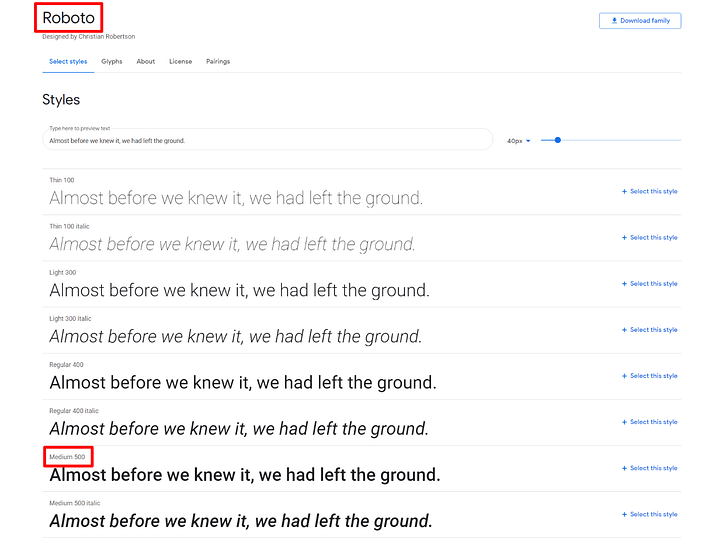
The next step is to choose the right font(s) that you like to use. If you want to see the preview of fonts, go to the Google Fonts website. Or else, you have the power to see the whole list in the plugin’s settings.
Note: When you find your font, please write down the name and specific styles to remember.
3. Edit Fonts:
Now, run for your WP Dashboard —> Appearance —> Customize. And you’ll notice a new Typography segment at the top of the sidebar.
In the side menu option, pick Default Typography. Here you’ll be able to pick a font for various types of content.
- Paragraphs – It’s a segment for text inside your posts/pages.
- Heading 01 – It’s a Title segment for your blog page/post.
- Heading 02 – Top heading for your page/post.
- Heading 03 – A subheading segment.
- And the count goes on.
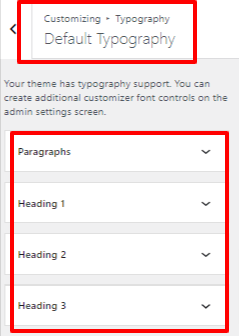
Now it’s time to edit the font for the segment you like to customize. So, pick the font name and weight you like.
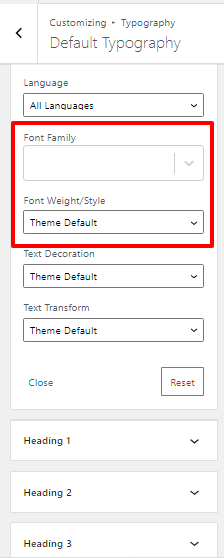
After inputting your choice, please click the Publish button to deliver the new font(s) live.
Disable and Remove Google Fonts
Some WordPress users disable google fonts to improve page loading speeds, performance, leverage browser cache, and GDPR compliance. There are several options to overcome the issue. We present to you now a great plugins call Disable Google Fonts.
In this case, use the plugin to, well, do just that. The developers assure you that this plugin will work with your theme : if not, you may contact them.
Summary:
If you’re a beginner or a non-technical person and want to change your theme name, details or migrate to a new one, this post is for you. Also, you’ll learn how to change theme images in WordPress, Logo, Favicon, and Google fonts. We also recommend to few more helpful resources
- Create A WordPress Website
- Update WordPress Theme Like A Professional
- How to Migrate a Single Site into a Multisite Network
And we hope, if you read this post carefully, it won’t take you astray. Plus, if you think we might need to add more info or erase some, please feel free to contact us via the comment sections below.
At last, if you find this post informative, please do us a favor by giving us your review. Cause those are very important for us. And stay with us for more attractive, engaging, and informative articles.

