Are you inquisitive about the intricacies of installing a WordPress theme? Whether you’re a seasoned web designer or a new developer, understanding the various methods and nuances of the installation process is crucial for successful website customization. In this post, we’ll delve into the diverse techniques, offering not only a detailed discussion but also a video tutorial to guide you through the entire process.
When it comes to WordPress theme installation, there are several pathways to explore. From uploading themes directly from the WordPress library to downloading templates and placing them in the theme directory, each method has its unique approach. As we embark on this journey, we’ll unravel the blueprint for successful setup, addressing key elements such as appearance, settings, and configuration.
So, whether you’re seeking education on the intricacies of theme customization or aiming to learn the ropes as a new developer, join us in this exploration of WordPress theme installation. With a focus on layout, header, footer, and overall design, we’ll equip you with the knowledge needed to effortlessly activate and customize themes. Let’s unlock the secrets together and pave the way for a seamless and successful WordPress theme installation experience.
For more information, be sure to check out these related posts on updating the latest version of a theme and fixing common errors
How to Install From WordPress.org
At the beginning stages of building a WordPress website. It’s recommended to consider uploading or installing a theme from the WordPress.org repository. This repository is a collection of free and secure high-quality templates that have been approved by a group of volunteer reviewers. Can be sorted by popularity, rating, and date added, and can be downloaded directly from the dashboard or from the WordPress.org. Provides an excellent resource for those who want to use reliable and well-coded themes for their website.
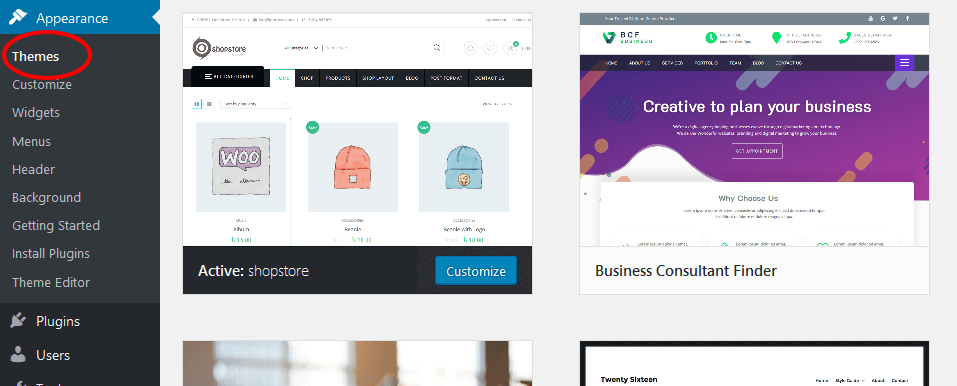
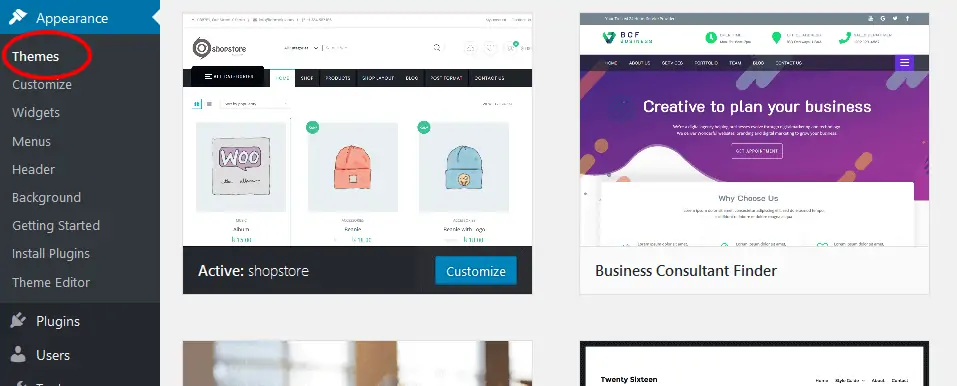
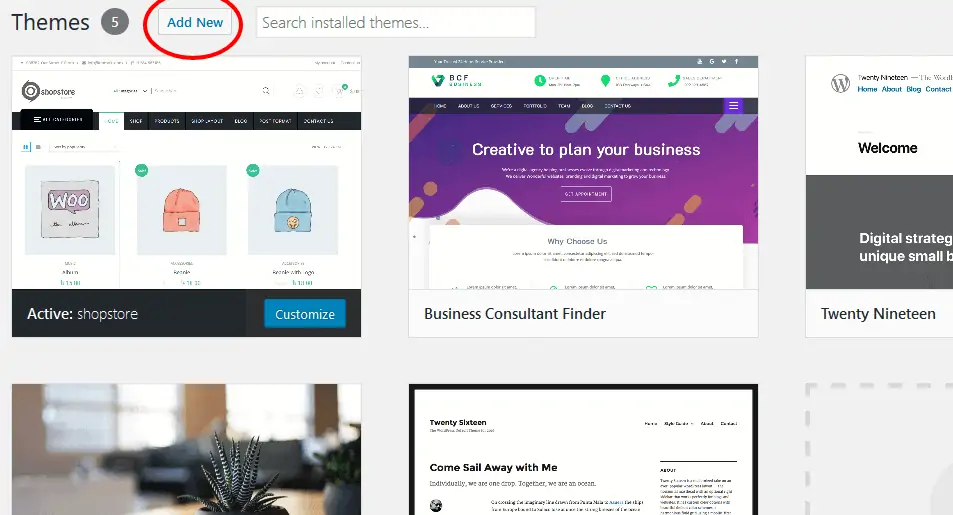
- Log in to your WordPress dashboard and go to Appearance → Themes.
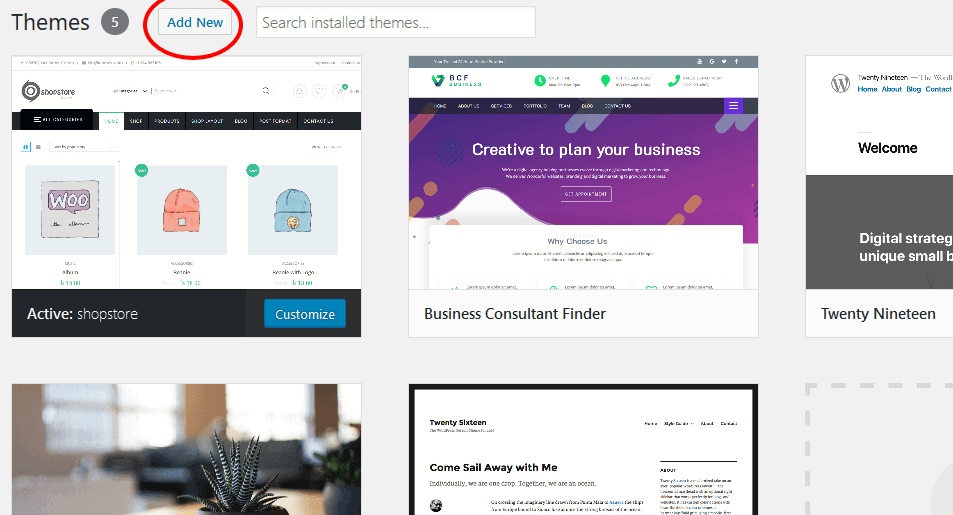
- Click the “Add New” button to access the listing.
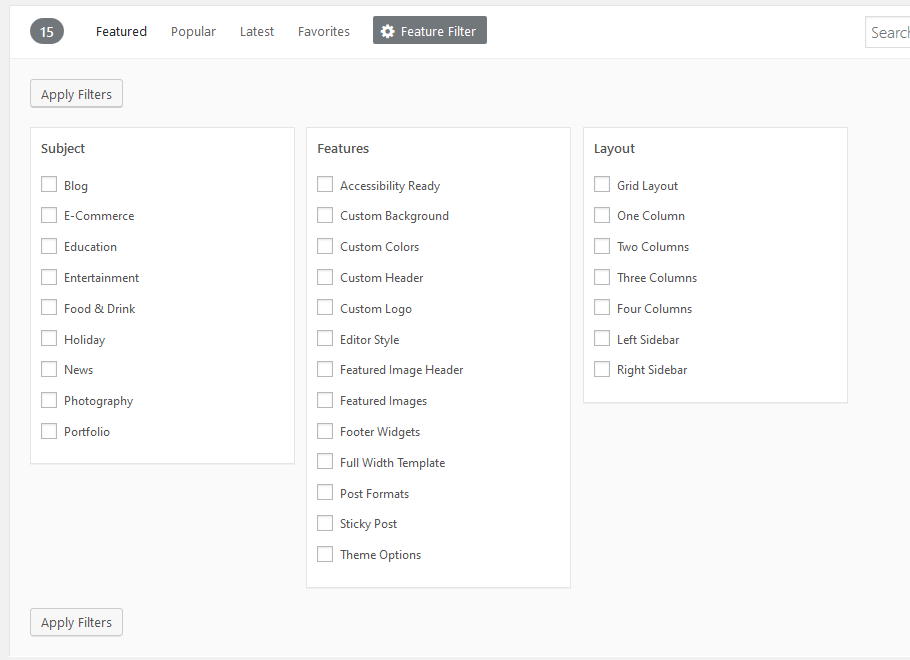
- Browse the themes by category, or use the feature filter to narrow down your search by subject, feature, and layout.

- Once you find a theme you like, click the “Install” button and then “Activate” to make it your default template.


If you’re not sure which one to choose from the showcase, here are some popular options to consider for your first time:
- Shoper: a free, beautiful, trendy, and modern theme.
- ShopStore: a multipurpose WordPress theme.
- KOGO: a fully customizable and free blog design.
- Divi, Avada, Flatsome, and OceanWP are also highly recommended to check out.
How to Install By Upload
By uploading or manually offers several benefits. Firstly, it provides more design flexibility by allowing you to use a custom template that may not be available in the repository. This helps your website stand out from others. Secondly, it allows you to install pro themes that you’ve purchased from third-party marketplaces. These professional themes may offer more advanced features and support than free themes. Lastly, installing a one by uploading or manually can be faster than searching for a theme in the WordPress.org repository. Especially if you already have a template file downloaded on your computer.
To upload and install one, the downloaded file needs to be in .zip format. Then following few steps to get started.
- Go to Appearance → Themes, just like before.
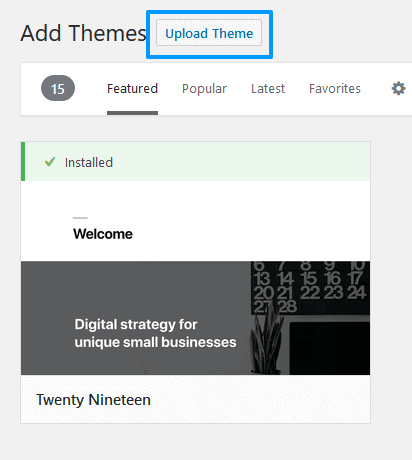
- Click on the “Add New” button.
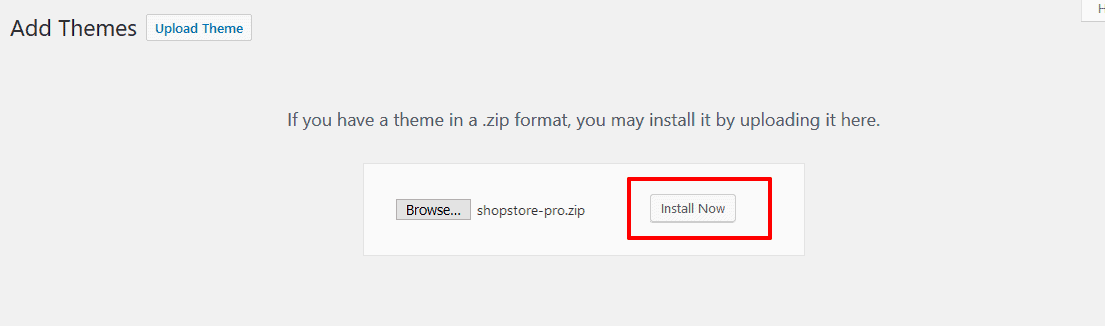
- At the top of the page, you’ll see the “Upload Theme” button. Click on it.
- Next, click on the “Choose File” button and select the theme file from your computer.
- Once you’ve selected the file, click on the “Install Now” button to install the theme.

- After the installation process is complete, you’ll see a page with two different buttons: “Activate” and “Live Preview.” Click on the “Activate” button to make the theme your default WordPress theme.
Congratulations, you have now successfully uploaded and installed a WordPress theme manually.
How to Install Using FTP:
Installing a theme using FTP has benefits such as overcoming file size and server restrictions, faster installation, and greater control. However, it requires technical knowledge and may not be suitable for beginners. The process involves connecting to the website’s server, navigating to the theme folder, and manually uploading the files with correct file structure and naming conventions.
To install a theme manually via FTP or file manager, you’ll need the path to your site provided in your hosting control panel, such as cPanel, CyberPanel for Lightspeed, or CloudPanel for NGINX. Here are the steps using FTP:
- Download an FTP software like FileZilla or WinSCP and set it up on your local machine.
- Log in to your server using your FTP server URL, FTP username, and FTP password.
- Navigate to the wp-content/themes/ folder (if you can’t find it, contact your hosting company for assistance).
- Upload the unzipped template’s folder from your computer to the server’s wp-content/themes/ folder. In FileZilla, you can do this by dragging and dropping the folder from your computer to the server.
- If there are multiple files and folders to upload, wait patiently for the upload to complete.
- Once the upload is completed, go to your WP admin area and navigate to Appearance → Themes to activate the theme.
- Search for the theme you uploaded and click on the Activate button. You can also preview the theme live.
In conclusion, there are multiple ways to install a WordPress theme or template, such as using the dashboard interface, manually uploading it via FTP or SFTP, or using a third-party plugin. Each method has its own pros and cons.
The manual setup process, as discussed earlier, can be easier than using certain plugins like WooCommerce, Elementor, or Jetpack. Moreover, selecting the right theme is crucial as it can simplify the development process with features such as demo import and pre-built blocks.
Please share your feedback and join me on social media platforms like Twitter and Instagram for more informative articles, if you found this article useful.