SSL (secure connection layer) is the standard security technology for establishing an encrypted link between a web server (web hosting account) and a browser (your website). This link ensures that all data passed between the web server and browsers remain private and comprehensive. This is particularly important for forms to encrypt the information that the site visitor enters the form as it passes to the Server.
To establish an SSL link, you must install an Secure Sockets Layer certificate on your website and then change all the URLs on your website to use https instead of http. When the SSL certificate is installed correctly and all URLs use https, users will see a lock icon in the URL field of their browser that indicates that the site is secure.
How do I install SSL on my WordPress website?
Many hosts now offer Let’s Encrypt Secure Sockets Layer certificates or other free options through their web hosting control panel. Log in to your web hosting control panel and look for SSL. You should have several options to choose from. WP Engine, Get Flywheel, Blue Host and many other web servers offer free SSL. Host Gator will allow you to install a free Let’s Encrypt Secure Sockets Layer certificate, but it requires contacting your support and must be renewed manually every three months, so you would opt for your $ 39 license.
Be sure to install the Certificate authority on the www and non-www versions of your site. This is very important to maintain the rank of your Google page after switching to SSL, even if you never used the www or www with your site before. You must ensure that all URLs are resolved in your main URL using https, for example:
Everyone should be redirected to
https://abcd.com
OR
https://www.abcd.com
Depending on your preferred domain.
You should never see your site in two different domains, as that will cause a penalty for duplicate Google content.
Also, keep in mind that if you have old domains or parked domains that you need to redirect to your primary domain, you may want to install SSL on them, just as Google can index the previous domain with Secure Sockets Layer and 301 redirection does not take place until AFTER that the https verification has been performed.
Here are some challenges I have faced:
- I had a client in Blue Host for whom Comodo could not verify SSL. I was talking on the phone with Blue Host several times, which is equivalent to about 2 hours of my time to finally solve everything. The Blue Host Secure Sockets Layer process involves adding some CNAME records to your DNS zone file that allows Comodo to verify that this domain resides on this web server. However, this client’s zone records were never propagated to the web, so Comodo could not verify the domain. Comodo needed to send an email to an address that did not exist (webmaster @) to verify the domain. I set up the email for my client, then Comodo was able to verify ownership when I received that email.
- In the iPower web hosting, you must first buy the SSL certificate, then return to the SSL area on the control panel and tell iPower to which domain the certificate should apply.
Change the general WordPress settings to use https
The installation of the SSL certificate may take a few hours or days. It usually takes a couple of hours or less. You can check the installation status in the control panel of your web hosting provider or simply visit the site using https. the site shows up well using https, then your certificate is installed. While the site shows the warning that the certificate is not valid, then SSL is not yet installed. If the process takes more than a day or two, contact your web host directly to find out what the delay might be.
The Blue Host SSL installation is usually very simple. The softest and easiest I’ve found so far. When I went to visit the sites, the general WordPress configuration was already configured and all the URLs seemed to be using Secure Sockets Layer.
In WP Engine, you must log in to your client’s portal after SSL has been successfully installed and go to the SSL section and configure the following: 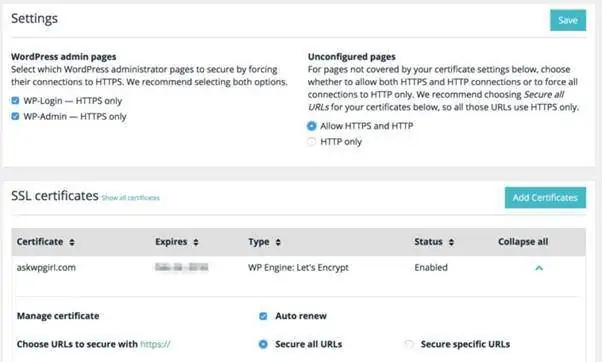
For all websites, regardless of the host, you will also want to do / verify the following:
- Log in to your WordPress Panel.
- Go to Settings> General.
- Change the two URLs in the General Settings to use https.
- Click on Save Changes..
You will be expelled from the WordPress Panel and must log in again
If these fields are dimmed, the URLs are set in the wp-config.php file that you can edit using the File Manager in the control panel of your web server or via FTP. Set the two URLs to use https.
Rewrite the URLs with the Better Search and Replace plug-in
Before doing this step, I recommend that you make a backup copy of your database in case you make a mistake. You want to be very aware when rewriting URL.
You will then have to rewrite your site URLs to use https for your images, multimedia files and internal hyperlinks. To do this easily and quickly:
- Go to Add-ons> Add new.
- Find the Better Search Replace plugins and install it and activate it:

- After activating the plugin, go to Tools> Best Search Replace.
- Search the URL of your site with the http and replace the URL with https. Select the wp_options, wp_postmeta and wp_posts tables, then run the search and replace. Be sure to uncheck Dry Run so it really runs.

Look for the green lock icon in the browser
If everything goes well with the previous two steps, the site should show a lock icon when visiting it from different browsers:
zStep 5 – Solve mixed content problems.
If any page appears with the padlock open (not safe):
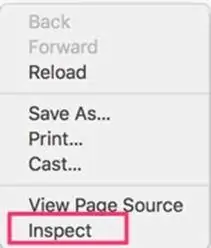
- Right-click (Ctrl + click on Mac OS) anywhere on the page and choose Inspect from the context menu. (This works best in Mozilla Firefox
and Google Chrome).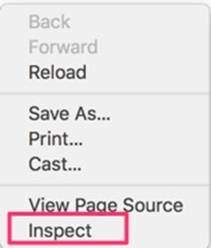
- Click the Console tab in the Inspector, and scroll through the Console to find any messages about “mixed content” like this:


In the example above, the mixed content is coming from the Revolution Slider slider that the person has on their home page. You may find similar mixed content being delivered via options set for the theme, sliders, visual layout builders, widgets (particularly text widgets), and other plugins. These are often not caught by the Better Search and Replace above.
You will need to manually edit these URLs in the plugin, theme settings, stylesheet, or widget area.
Clear the website, hosting and browser cache
To avoid solving mixed content problems that do not exist, be sure to completely clear any cache that the web hosting provider can provide. For example, in Site Ground and Get Flywheel, you will want to log in and clear the cache completely from the control panel. In WP Engine, you can go to the WP Engine section of your WordPress panel and clear the object cache.
Also, empty the browser cache and any other caching plug-ins that you may have installed.
How do I inform Google of my change to https?
1 – Log in to your Google Analytics account.
2 – Click on the gear icon in the lower left column.
(Six months from now this may be in the upper right, lower right, upper left corner of the page. As soon as I post something, Google moves this. Then, just look for the settings icon or some type of Administrator Link ).
3 – Click on Property Settings and change the default URL to use https: // as shown below.
Click Save to save this change.
- Log in to your Google Analytics account.
- – Click on the gear icon in the lower left column.
(Six months from now this may be in the upper right, lower right, upper left corner of the page. As soon as I post something, Google moves this. Then, just look for the settings icon or some type of Administrator Link ). - Click on Property Settings and change the default URL to use https: // as shown below. Click Save to save this change.
- Return to the administration page and click on View settings and make the same change there and click on Save.
- This will not affect any previous analytical data, but will allow Google Analytics to now track Hypertext Transfer Protocol Secure URLs from now on.
Add the site with https to Google Search Console.
You should have already added your site to Google Search Console using Hypertext Transfer Protocol for the URLs. Otherwise, you will want to add your domain with Hypertext Transfer Protocol, both those that are not www and www, and with https both those that are not www and the www to Search Console. For instructions on this process, see: Submitting your WordPress site to Google Search Console.
Send the domain name change to Google
If you migrate your site from Hypertext Transfer Protocol to HTTPS, Google treats it as a movement of the site with a URL change. This may temporarily affect some of your traffic numbers. See the site’s movement summary page for more information.
SSL SEO Considerations
Not making the change to https correctly can greatly affect your SEO. For example, if you cannot install SSL on your www domain while using non-www, www traffic will not be redirected correctly to non-www because browsers first verify Hypertext Transfer Protocol status before doing any other Apache redirect.
Be sure to test all domains where your site can be found in the past and present to make sure they redirect correctly to your primary domain.
.htaccess Rules for pointing parked domain to primary domain
If you have a parked domain, you will want to make sure that the http and Hypertext Transfer Protocol Secure
for this domain (if Google has indexed the https for it in the past) both point to the primary domain by editing your .htaccess file on the server with these redirects:
 RewriteEngine on
RewriteCond %{HTTP_HOST} ^olddomain.com$ [OR]
RewriteCond %{HTTP_HOST} ^www.olddomain.com$
RewriteRule^(.*)$ https://newdomain.com/$1 [R=301]
Conclusion
After performing all the steps above, you will have an Hypertext Transfer Protocol Secure WordPress website. Depending on the selected SSL certificate, the company name and padlock icon may appear in the browser address bar.

