Embarking on web design from scratch on your macOS device? Establishing a development environment on your Apple computer requires a well-organized approach to setting up WordPress effectively. In this guide, we’ll provide you with a blueprint on how to implement WordPress on MAC using MAMP, a locally hosted testing server. This process allows you to arrange, integrate, and organize your coding fundamentals, enabling you to customize the look and feel of your site before deploying it online.
To get started, we’ll walk you through the inspiring journey of configuring MAMP to serve as your testing server. Learn how to programmatically activate software on your macOS, and discover the education you need to navigate the control panel seamlessly. From configuring your testing server at 127.0.0.1 to deploying new themes or plugins, these five easy steps will guide you through the process, ensuring that you have a reliable and inspiring WordPress development environment locally on your Macintosh.
Explore further with related articles to delve into localhost software options and learn how to upload a custom theme.
What is MAMP Local Server?
Before diving into the intricacies of installing WordPress on a Mac, it’s essential to grasp the essence of MAMP – an acronym denoting Macintosh, Apache, MySQL, and PHP. This open-source web development environment serves as a versatile tool applicable to both macOS and Windows operating systems. Plays a pivotal role in the creation and testing of dynamic web applications within a local environment, allowing developers to refine their projects before deploying them to live servers. Macintosh refers to the operating system, Apache acts as the web server software, MySQL serves as the relational database management system, and PHP functions as the scripting language for WordPress development.
With MAMP, developers can replicate a live server environment on their Mac computers, enabling them to develop, modify, and test web applications without requiring an internet connection. This local server environment is invaluable for debugging code, assessing website functionality, and ensuring smooth application performance before deploying to a production server.
Moreover, the benefits of using MAMP extend beyond its technical capabilities, including the ability to work offline, learn theme creation, and test desired WP plugins before launching them to a wider audience.
System Requirements for Local WordPress Installation on Mac
Before delving into the process of running WordPress locally on your macOS, it’s crucial to ensure that your system meets specific terms and conditions. The following prerequisites must be satisfied:
- macOS Version: Your macintosh operating system must be Sierra 10.12 or a later version to support the installation.
- User Account: Ensure that you have a user account that is part of the admin group. You can verify this by navigating to “System Preferences” and then selecting “Users and Groups.”
By adhering to these system requirements, you pave the way for a smooth installation process. It’s essential to meet these conditions to guarantee a successful setup of WordPress on your local environment. Let’s proceed with the installation process, breaking it down into step-by-step instructions for your convenience.
STEP 1: Download & Install MAMP
Begin your journey of installing WordPress locally on your Mac by visiting the official site of MAMP. Click on the free download option, where you’ll encounter two additional choices. Once the download completes, proceed to the next step.
Now, open the downloaded file and drag it into the “Applications” folder. Subsequently, follow the prompts by clicking “Next,” mirroring the process you would typically follow when installing other software.
With the installation finalized, you are ready to launch MAMP on your Apple computer. Take note that there’s also a Pro version available, so ensure you select the correct one. This seamless setup allows you to create a secure and efficient development environment, ideal for testing your WordPress server locally.
STEP 2: Configure MAMP Settings
Enhance your user experience by customizing MAMP settings in a few easy steps. Start by accessing the preference menu, and within it, navigate to the Port Tab.

Within the Port Tab, focus on the Apache and Nginx ports. Specifically, adjust the Apache port from its default setting of 8888 to the standard port 80. This simple configuration change streamlines your local website access. Keep in mind that this modification requires your computer’s admin password each time you initiate the MAMP server.
It’s noteworthy that this adjustment facilitates access to your local site through http://localhost instead of http://localhost:8888. This optimization not only simplifies your setup but also contributes to a more efficient local web server environment.
STEP 3: Configure Document Root for Optimal WordPress Management
In the next crucial step of setting up your local WordPress environment, it’s time to designate the document root folder where your website files will reside. Although the default document root for Mac is typically /Applications/MAMP/htdocs, you have the flexibility to personalize this location.
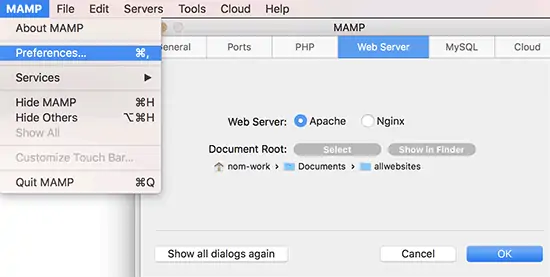
Navigate to the preference dialogue box and access the web server tab. Here, select the folder where you intend to store your website files. It’s advisable to create a new folder for each site to maintain an organized structure. Feel free to rename this folder to suit your project:for instance, htdocs or loopback. Click “OK” to save your configuration changes.
This meticulous setup not only optimizes the performance of your local web server but also streamlines the deployment and execution of your websites. By configuring the document root, you pave the way for a seamless and efficient local development environment on your apple computer.
STEP 4: Create a Database to Store WP
In this pivotal step, we will create a database to serve as the repository for all WordPress data. This preemptive action ensures a smooth installation process.
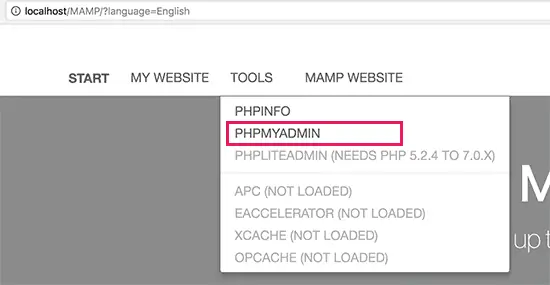
Begin by clicking the “Open Web Start Page” button in the MAMP window. A new browser window will emerge, prompting you to navigate to “Tools” and then “phpMyAdmin” from the top menu bar.
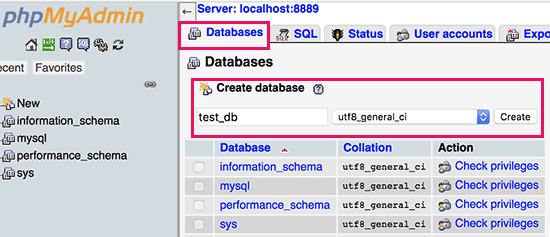
Within phpMyAdmin, click on “Databases” and then proceed to “Create Database.” Assign a name to your database in the designated field. The default settings for database connection collation can be retained. Click the “Create” button, and voila! Your new database is now ready for WordPress installation.
Efficiently managing your database through PhpMyAdmin is a crucial step in ensuring a robust foundation for your WordPress site. This meticulous process not only facilitates a seamless installation but also lays the groundwork for a well-organized and efficient data storage system.
STEP 5: Installing WordPress on Mac: A Simple yet Powerful Process
Now, let’s dive into the process of installing WordPress on your Mac. Begin by visiting WordPress.org, where you can download the latest version. Once the download is complete, unzip the file.
Copy the unzipped files and paste them into your MAMP document root folder. Feel free to rename this folder to your preference.
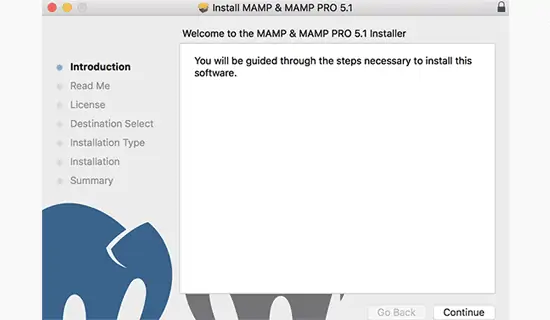
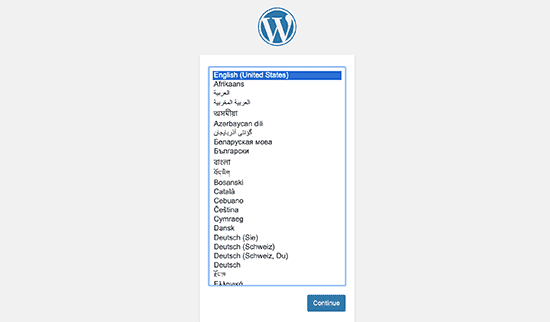
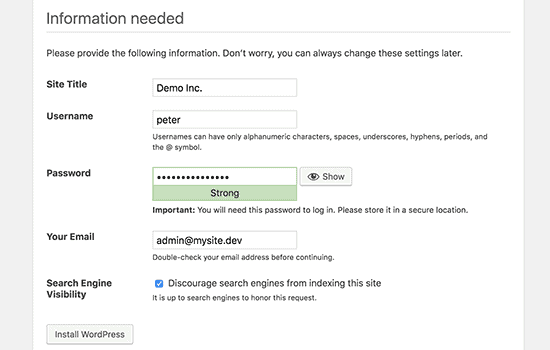
In the installation wizard, select your preferred language and click the “Continue” button. On the subsequent screen, complete the information form and click “Let’s Go.”
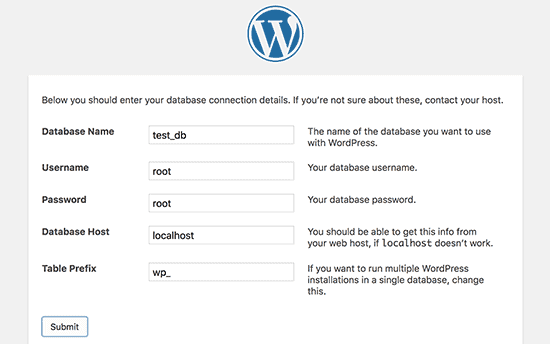
The next page prompts you to provide database information. Use “Root” for both username and password, and set the database host as “localhost.”
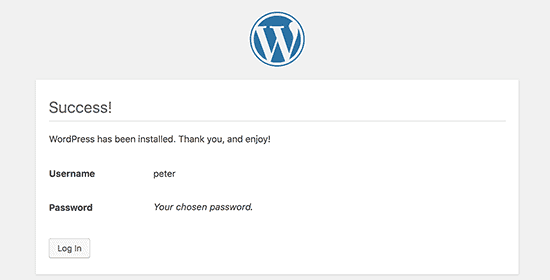
WordPress will proceed with the installation, and a success message will greet you upon completion.
This streamlined process ensures that your WordPress installation on your Mac device is both successful and efficient. You are now ready to explore the vast possibilities of WordPress, from themes and plugins to deploying high-end websites with ease.
Bonus: Watch a Step-by-Step Video Guide for Installing WordPress on Mac
For those who find the written instructions challenging, there’s a bonus solution! Check out the YouTube video linked below for a comprehensive visual guide on how to run WordPress on your Mac.
As a web developer, leveraging video tutorials can be an effective way to grasp the intricacies of building a localhost environment on your Mac. Whether you’re a beginner or seeking a different approach, this video provides a hands-on demonstration, making the process more accessible and engaging.
Final Thought
The process of installing WordPress on your Mac using MAMP unfolds seamlessly through the implementation of five easy steps. By utilizing localhost software like MAMP, you can effortlessly build and deploy a testing server on your macOS device, ensuring a secure and efficient environment for web development. The integration of 127.0.0.1 as your web server’s IP, coupled with root access and a hand-picked selection of backend frameworks, produces an organized and powerful kit for diverse purposes, ranging from personal blogs to large-scale eCommerce platforms.
In essence, this guide empowers users with the skills to arrange and integrate the essential components required to establish a virtual and powered back-end for their Mac, making the setup of WordPress on MAMP a favorable choice for a wide array of users, from beginners to experienced developers. With this robust inventory of steps, users can confidently organize and deploy WordPress, creating a reliable foundation for the successful implementation of various web-based projects on their iMac devices.

