Switching hosts feels risky because the two things people fear most, a broken site and lost orders, are real risks when a migration is rushed. The good news: you can move a WordPress site to a new server without a single minute of visible downtime. The trick is simple. Your old server keeps serving visitors while you build, test and sync a complete copy on the new server. Visitors only move over when you change DNS, and by then the new site has already been proven.
This guide (updated for 2026) walks through the full process: preparation, the manual SFTP + MySQL method, migration plugins, WooCommerce order safety, SEO protection, troubleshooting and a final verification checklist. It also covers the parts most tutorials skip: the final database sync, stale IPv6 records, email (MX) records, and rollback.
1. Introduction: Can You Migrate a WordPress Site Without Downtime?
Yes, with one honest caveat. “Zero downtime” means visitors never see an error page, a maintenance screen or a half-built site. It does not mean nothing ever changes on the database in the final minutes. A WordPress site is a living database: comments, form entries, user registrations and, on a store, orders keep arriving while you copy things around. That is why a proper zero-downtime plan has two phases:
- Build and test the copy on the new server while the old server stays live.
- Freeze, sync the latest changes, then switch DNS so the new server starts with the freshest data.
For a brochure site or blog, step 2 takes a few minutes and nobody notices. For a busy WooCommerce store, it is the part that decides whether you lose orders, so we give it its own section below.
Google’s own documentation describes the same pattern for hosting changes where URLs stay the same: copy and test the new site, lower DNS TTL values in advance, then update DNS to start the move and monitor both servers until traffic to the old one stops (see Google Search Central: Changing your hosting). We follow that model throughout.
Quick answer: Copy the files and database to the new host, test the copy with a local hosts-file entry, sync the final changes, lower your DNS TTL beforehand, then point your domain’s A record at the new server. Keep the old host running for at least a week.
2. What You Need Before Migrating Your WordPress Website
New hosting account and server access
Buy or activate the new plan without installing WordPress on it (unless you are using a plugin that needs a blank WordPress, covered later). You need the server IP address or temporary hostname, SFTP/SSH credentials and access to the control panel (cPanel, Plesk, a custom dashboard or SSH). If you are comparing servers, our Nginx vs LiteSpeed comparison explains how the web server layer affects WordPress rewrite rules and caching, which matters when you move between stacks.
WordPress files and database access
On the old host you need file access (SFTP, SSH or File Manager) and database access (phpMyAdmin, Adminer or SSH with mysqldump). Find your current database name and user in wp-config.php.
Domain and DNS management access
Know where your DNS is actually managed. It may be your registrar, your old host, or a service like Cloudflare. This is the single most common surprise. If you cannot log in to the DNS panel, you cannot finish the migration. Also write down every existing DNS record (A, AAAA, CNAME, MX, TXT) before you touch anything.
Backup and migration tools
- A full backup stored off the server (not just on the old host)
- An SFTP client such as FileZilla, or SSH access for
rsync - A text editor for
wp-config.phpand the hosts file - Optional: WP-CLI on both servers, or a migration plugin
- A list of third-party services tied to your IP or domain (payment gateways, firewalls, API keys, license keys)
Many hosts offer a free managed migration. If you would rather not do this yourself, ask the new provider before you buy. If you do it yourself, the rest of this guide is your playbook.
3. How to Prepare Your WordPress Site for Migration
Create a complete WordPress backup
Back up files and the database, and download a copy to your computer or cloud storage. A host-level backup is good; an independent one is better. Test that the backup file is not zero bytes. If anything goes wrong, this is your rollback. For a deeper security-minded prep list, see our WordPress security checklist.
Check PHP and MySQL compatibility
Compare the PHP version, MySQL or MariaDB version and PHP extensions on both servers. The new server should match or exceed the old one, and still be supported by your theme and plugins. Moving and upgrading PHP in one step makes failures hard to diagnose. Match first, upgrade later. Google’s guidance for site moves follows the same logic: change one thing at a time (Google: Changing Your Web Hosting and SEO).
Review plugins, themes, and WordPress versions
Update WordPress core, themes and plugins on the old site before you copy it, and remove plugins you no longer use. A smaller site migrates faster and fails less. Do not install new plugins or change designs mid-migration. If you use a child theme or a customized theme, confirm the files are in the copy; our guide on how to install a WordPress theme helps if you need to reinstall one on the new server.
Reduce DNS TTL before migration
TTL (Time to Live) controls how long resolvers cache a DNS record. At least 24 to 48 hours before the move, lower the TTL on your A (and www) records to 300 seconds (5 minutes), or the lowest value your DNS provider allows. Cloudflare’s docs explain that TTL controls how long a record is cached and therefore how long updates take to reach users (Cloudflare: Time to Live), and they list lowering TTLs as a standard preparation step for a cutover (Cloudflare DNS best practices, phase 2).
Why wait 24 to 48 hours? Because resolvers that already cached your old record will keep it for the old TTL. If it was 24 hours, the lowered value only takes effect after that cache expires.
4. How to Set Up Your New WordPress Hosting Environment
Add your domain to the new hosting account
Add the domain as a site or add-on domain in the new control panel without changing nameservers yet. This creates the document root (for example public_html) and a virtual host the server will answer for once DNS arrives. Make sure the folder is empty; some hosts auto-install WordPress, and if so, delete it unless your migration method needs it.
Create a new MySQL database and user
Create an empty database and a user, then give that user all privileges on the database. Note down four values: database name, username, password and host. On many shared hosts the names are prefixed with your account name, and the host is not always localhost.
Configure PHP and server settings
Match the old server’s critical limits so large imports and plugins behave the same: memory_limit, max_execution_time, upload_max_filesize, post_max_size and required PHP extensions (curl, gd, mbstring, xml, zip, intl or imagick if you used them). If the old site had custom rewrite rules in .htaccess and the new server runs Nginx, you must translate them. Apache rules do not work on Nginx.
Install an SSL certificate
Your new site must be able to serve HTTPS from day one, or visitors will hit certificate warnings the moment DNS flips. The catch: automatic HTTP-validated certificates usually cannot be issued until the domain already points at the new server. You have three practical options:
- Ask the host to install or import your existing certificate (and private key) before the switch.
- Use DNS validation, which proves domain ownership with a DNS TXT record instead of a web request. Let’s Encrypt documents this approach under its challenge types, and it works before cutover if your DNS provider has an API or you add the record by hand.
- Use your host’s pre-cutover SSL tool. Several managed hosts can issue a certificate for a domain that is not yet pointed at them.
Our walkthrough on how to install an SSL certificate on WordPress covers the certificate side in detail.
5. How to Migrate a WordPress Site to a New Host Without Downtime (Step-by-Step)
This is the manual method with SFTP and phpMyAdmin (or the command line). It works with any host, keeps you in control and is what most agencies fall back on for large or unusual sites. The official WordPress handbook describes the same core moves: export the database, update wp-config.php with the new database details, upload the files and import the database (WordPress Developer Resources: Migrating WordPress).
Step 1: Copy WordPress files to the new server
Copy the entire WordPress directory, especially wp-content (themes, plugins, uploads, mu-plugins), wp-config.php, .htaccess and any custom root files such as robots.txt or verification files. You can use SFTP, but because your domain still points to the old host you must connect to the new server by IP address or temporary hostname, not by the domain.
If you have SSH on both servers, rsync is much faster and can be re-run later to catch only the changed files:
rsync -avz --progress -e ssh /var/www/html/ user@NEW_SERVER_IP:/var/www/html/Run it once now, and run it again during the final sync in Step 7.
Step 2: Export the existing WordPress database
Use phpMyAdmin’s Export (Quick, SQL format) or the command line:
mysqldump --single-transaction -u OLD_DB_USER -p OLD_DB_NAME > old-site.sql
# or, with WP-CLI:
wp db export old-site.sql
The --single-transaction flag gives a consistent snapshot of InnoDB tables without locking the live site.
Step 3: Import the database into the new host
mysql -u NEW_DB_USER -p NEW_DB_NAME < old-site.sql
# or, with WP-CLI:
wp db import old-site.sql
In phpMyAdmin, large files can hit the upload limit. Compress the dump (.sql.gz), raise the limit, or use the command line. After import, confirm the table count matches the old database and that tables use the same prefix.
Step 4: Update the wp-config.php file
Edit wp-config.php on the new server with the new database credentials. Leave the table prefix and security keys as they are. The details are documented in the wp-config.php reference.
define( 'DB_NAME',     'new_database_name' );
define( 'DB_USER',     'new_database_user' );
define( 'DB_PASSWORD', 'new_strong_password' );
define( 'DB_HOST',     'localhost' ); // use the host your provider gave you

$table_prefix = 'wp_'; // must match the imported tables
If the old wp-config.php contains host-specific values (cache paths, Redis settings, hard-coded absolute paths, WP_CACHE), review each one. Those are classic reasons a migrated site loads but behaves oddly.
Step 5: Update URLs and database references if necessary
If your domain stays the same, you do not need to change any URLs. That is exactly what makes this a clean, SEO-safe move. You only need a search-replace if the new copy temporarily lives at a different address (for example a staging subdomain) or if you are switching between http and https.
Never run a raw SQL find-and-replace on a WordPress database, because WordPress stores serialized data that breaks when string lengths change. Use WP-CLI’s serialization-aware command and test with a dry run first (WP-CLI search-replace reference):
wp search-replace 'http://old-address.example' 'https://example.com' --all-tables --dry-run
wp search-replace 'http://old-address.example' 'https://example.com' --all-tables
Step 6: Test the migrated website using a temporary URL or hosts file
This is the step that makes zero downtime possible. A hosts file is a local text file on your computer that overrides DNS for names you list. By mapping your real domain to the new server’s IP on your machine only, you can browse the new site at the real domain while everyone else still gets the old site.
To edit the hosts file:
- Windows: open Notepad as administrator, then open
C:\Windows\System32\drivers\etc\hosts. - macOS or Linux: run
sudo nano /etc/hostsin Terminal.
Add one line with the new server’s IP address followed by your domain (include the www version too):
203.0.113.25 example.com www.example.comSave, then flush your local DNS cache (ipconfig /flushdns on Windows; on macOS sudo dscacheutil -flushcache; sudo killall -HUP mDNSResponder) and restart the browser. Prefer not to edit files? curl can do the same for a single request:
curl -I --resolve example.com:443:203.0.113.25 https://example.com/Make sure you are really looking at the new server. Drop a tiny file such as migration-check.txt into the new server’s web root only, then request https://example.com/migration-check.txt. If it loads, you are on the new host. If it 404s, you are still seeing the old one (browser cache, a CDN, or a missed flush).
What to test while on the hosts entry:
- Home page, posts, pages, categories and search
- Admin login and a test edit (do not publish anything you want to keep)
- Media library images and theme assets
- Contact forms and outgoing email
- Menus, widgets, custom post types, page builder pages
- Permalinks: if inner pages return 404, go to Settings, Permalinks and click Save, or run
wp rewrite flush(this is the “flush permalinks” step) - HTTPS and no mixed-content warnings
Heads up: if your domain sits behind a proxy CDN such as Cloudflare, the hosts file may be bypassed or may hit the CDN instead of your origin. In that case test through the host’s temporary URL or the origin IP.
Step 7: Sync the latest database changes
While you were testing, the old site kept collecting comments, form entries and users. Right before the switch, capture those changes:
- Announce a short content freeze to editors: no new posts, no theme changes. For a store, see the WooCommerce section.
- Re-export the old database and re-import it over the new one (drop and recreate the tables, or use
wp db reset --yesfirst, then import). - Re-run
rsync(or re-upload thewp-content/uploadschanges) to copy any new media. - Re-check the new site through the hosts entry for one minute.
This freeze usually lasts a few minutes for a blog. During it the old site stays online and readable, so visitors see nothing different.
Step 8: Update DNS records to point to the new server
You have two ways to switch:
| Method | What you change | Best when |
|---|---|---|
| Update the A record | Keep current nameservers. Change the A record (and www) to the new server IP. | You manage DNS at the registrar, Cloudflare or another DNS host. Cleanest and keeps email records untouched. |
| Change nameservers | Point the domain at the new host’s nameservers, which then serve a brand-new DNS zone. | You want the new host to manage DNS. Recreate every old record first (MX, SPF, DKIM, TXT verification), or email and integrations break. |
Do not forget the AAAA record. If your old DNS has an IPv6 address and you only update the A record, IPv6 visitors will keep landing on the old server. Either update it to the new server’s IPv6 address or delete it.
Leave your MX records alone unless email is moving too. A website migration does not require an email migration, and keeping MX unchanged protects deliverability. If you switch nameservers, double-check that the SPF, DKIM and DMARC TXT records survived the trip.
Step 9: Verify the website after DNS propagation
“Propagation” is really caches expiring. With a lowered TTL, most visitors switch within minutes; stragglers can take longer. Check from several angles:
dig +short example.com A @8.8.8.8
dig +short example.com A @1.1.1.1
curl -sI https://example.com/migration-check.txt
Remove your hosts-file entry now, or you will keep seeing the new server and never know whether DNS has actually changed. Then watch the access logs on both servers. When requests to the old one drop to nearly zero, your traffic has moved. Because the old server still answers correctly in the meantime, nobody was ever sent to a broken page. How quickly the switch spreads depends mostly on the TTL that was set before the change (see this DNS TTL and propagation guide from December 2025), which is why the earlier TTL reduction pays off.
6. How to Migrate WordPress Using a Migration Plugin
Plugins package your files and database into a portable bundle and rebuild the site on the new server. They are excellent for small and medium sites and for people who prefer not to touch a database. The zero-downtime rule stays the same: do not change DNS until you have tested the copy.
Before choosing, check each plugin’s current free-tier limits (import size caps, cloud storage, multisite, and whether direct server-to-server transfer is free), because vendors adjust these regularly and reviews disagree.
Duplicator
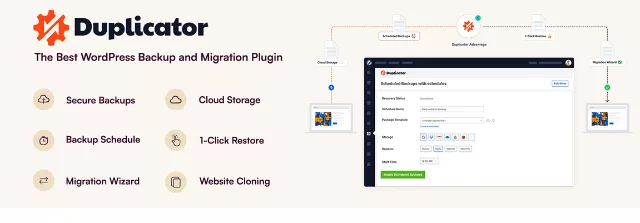
Duplicator creates an archive file plus an installer.php. You upload both to the empty new web root, open the installer in your browser through the hosts-file entry, enter the new database details and let it rebuild the site. It is a favorite for no-downtime moves because the installer works before DNS changes. The main watch-out is that it builds the archive on your old server, so tight disk space or short execution limits can stall large sites.
All-in-One WP Migration
All-in-One WP Migration exports the whole site to a single file you import into a fresh WordPress install on the new host. It is very beginner friendly. The free version limits import size, and larger sites usually need a paid extension or a server-side limit change. Install a blank WordPress on the new host first and finish the import through the hosts entry.
UpdraftPlus

UpdraftPlus is primarily a backup plugin that doubles as a migration tool. You back up, restore on the new site, and it handles URL changes. Direct site-to-site cloning is a premium add-on; the free route is manual backup download and upload. A good choice if you also want scheduled backups afterward.
WPvivid Backup & Migration
WPvivid offers backup, restore and a transfer feature that moves a site between two WordPress installs without a manual download. Useful for mid-size sites when you want fewer manual steps.
Migrate Guru
Migrate Guru runs the transfer from the vendor’s own infrastructure rather than your server, which helps when the old host has tight resource limits or a size ceiling that stops other tools.
| Plugin | How it works | Best for | Watch out for |
|---|---|---|---|
| Duplicator | Archive + installer script | Zero-downtime moves with hosts-file testing | Resource limits on the old server |
| All-in-One WP Migration | Single export file into fresh WordPress | Beginners and small sites | Free-version import size cap |
| UpdraftPlus | Backup then restore | Sites that also need scheduled backups | Direct migration is a premium add-on |
| WPvivid | Backup, restore, site-to-site transfer | Mid-size sites, fewer manual steps | Check current free-tier features |
| Migrate Guru | Transfer from vendor servers | Weak or limited old hosts | Needs outbound access to the vendor |
Plugin migration workflow in six moves: back up first, create the plugin package on the old site, upload to the new server, run the restore or installer via the hosts entry, test, then freeze and re-sync before the DNS switch. Remember: after the plugin runs, delete the leftover installer files and archives from the new server. Leaving them behind is a security risk. If something looks off afterward, our guide to recovering a hacked WordPress site shows what exposed leftovers can lead to.
7. Manual WordPress Migration vs. Migration Plugins: Which Is Better?
| Factor | Manual (SFTP, rsync, MySQL) | Migration plugin |
|---|---|---|
| Skill needed | Moderate to advanced | Beginner to intermediate |
| Speed on small sites | Slower to set up | Fast |
| Large sites and big databases | Handles them well | May hit size, memory or timeout limits |
| Control and repeatability | Full control, easy to re-sync with rsync | Less control; re-running means rebuilding |
| Final delta sync | Simple: re-export DB, re-run rsync | Often means repeating the whole export |
| Cost | Free | Free tier available; paid for big or advanced moves |
| Failure points | Typos in wp-config.php, import limits | Server limits, plugin conflicts, size caps |
- The site is large or a WooCommerce store
- You have SSH and want repeatable syncs
- A plugin keeps timing out
- You manage many sites as an agency
- The site is small or medium
- You are not comfortable with databases
- You want a guided process
- You also want ongoing backups
Our take: if the site makes money, use the method that lets you re-run the final sync quickly. That is usually manual, or a plugin you have already tested on a staging copy.
8. How to Migrate a WooCommerce Website Without Losing Orders
A WooCommerce store is the hardest migration because the database changes constantly. An order placed on the old server after you exported the database does not exist on the new one. If you point DNS at the new server and skip that gap, those orders and customers vanish from your new admin. If you are new to the platform, start with what WooCommerce is and how it works.
Put the store into maintenance or controlled read-only mode when syncing
Plan the final sync for your quietest hours (check your sales analytics). Then pick a strategy:
- Short checkout freeze (best for most stores). Turn on maintenance mode or temporarily disable checkout on the old site, export the database, import it on the new server, then switch DNS. The shop pages can stay browsable if you only pause checkout. The downtime visitors notice is at most the checkout pause, not the whole site.
- Maintenance mode on the old server after DNS switch. Move DNS first, then immediately put the old server into maintenance so any visitor still cached on it cannot place an order there (an approach discussed in ServMask’s WooCommerce migration guide).
- Delta-sync orders without a full freeze for stores that cannot pause. Export only the order and customer tables after the main cutover and import them into the new database. This is advanced and easy to get wrong; see the table notes below.
Synchronize recent orders and customer data
Know where your orders live. Modern WooCommerce can store orders in dedicated High-Performance Order Storage (HPOS) tables instead of wp_posts. Both the new and old site must use the same storage mode before you copy order tables, otherwise you create mismatches. Pressable’s guide lists the tables involved: with HPOS on, the core tables are wp_wc_orders, wp_wc_order_addresses, wp_wc_order_operational_data and wp_wc_orders_meta; with HPOS off, orders sit in wp_posts and wp_postmeta (which must move together) plus the order-items tables (Pressable: migrating WooCommerce orders and customers between sites). Customers live in wp_users and wp_usermeta.
WooCommerce provides WP-CLI tools to check and repair HPOS sync, including wp wc hpos status, wp wc hpos sync and wp wc hpos verify_data (WooCommerce: HPOS CLI tools). For deeper background, read the WooCommerce guide for large stores.
Practical rule: for the final sync of a store, re-export the entire database during the freeze rather than cherry-picking tables. It is slower on huge stores but far safer. Only delta-sync tables when you have tested the exact process on a staging copy.
Verify payment gateways and checkout functionality
- Run a test order in sandbox mode, then a small real order you refund
- Check payment gateway webhooks and callback URLs (some are IP or domain locked)
- Confirm the SSL certificate covers checkout and the REST API
- Test shipping calculation, tax rules and coupon codes
- Verify order emails reach the customer and the admin (check SMTP settings)
- Check scheduled actions (Action Scheduler), subscriptions and renewals are running
- Confirm cart sessions and caching rules exclude cart, checkout and account pages
If you are shopping for extra store tooling after the move, our list of essential WooCommerce plugins is a good starting point.
9. Common WordPress Migration Problems and How to Fix Them
| Problem | Likely cause | Fix |
|---|---|---|
| White screen after migration | PHP version mismatch, fatal plugin error, memory limit, wrong file permissions | Enable WP_DEBUG and read wp-content/debug.log. Rename the plugins folder to isolate the culprit. Raise memory_limit. Set folders 755, files 644. |
| “Error establishing a database connection” | Wrong DB name, user, password or host in wp-config.php; user lacks privileges; DB host is not localhost |
Re-check all four values, confirm the user is assigned to the database with all privileges, ask the host for the correct DB host. |
| SSL certificate errors | Certificate not yet issued or not installed for the domain or www | Install or import the cert before DNS change, or use DNS validation. Cover both example.com and www. |
| Broken images and missing media | Incomplete uploads copy, wrong permissions, old absolute URLs |
Re-run rsync for wp-content/uploads, fix ownership and permissions, run a serialization-aware search-replace. |
| Mixed content warnings | Hard-coded http:// URLs in content, theme or builder data |
Search-replace http:// to https:// with WP-CLI. See the MDN mixed content reference for how browsers treat it. |
| 404 on inner pages, home works | Rewrite rules missing, Apache rules on Nginx, permalinks not flushed | Save Settings, Permalinks (or wp rewrite flush). On Nginx, add the WordPress try_files rule. Copy custom redirects across. |
| Still seeing the old site | DNS cache, hosts file left in place, CDN cache, AAAA record | Flush local DNS, remove the hosts entry, test with dig, purge CDN, check IPv6. |
| Email stopped working | MX or SPF/DKIM records lost during a nameserver change; SMTP plugin blocked by new host | Recreate every DNS record from your pre-migration list. Check the host’s outbound SMTP rules. |
| Login redirect loop | Site URL mismatch, cookie domain, forced HTTPS plus proxy headers | Check WP_HOME and WP_SITEURL, clear cookies, review the HTTPS and proxy settings. |
| Cron jobs not running | Server-level crons not recreated, DISABLE_WP_CRON set without a system cron |
Recreate system crons on the new host or re-enable WP-Cron. |
| Slow site after the move | Cold caches, missing object cache, different PHP handler or limits | Warm and reconfigure caching, confirm opcache and object cache are active, compare PHP workers and limits. |
Always-forgotten items
- License keys tied to a domain or IP (re-activate them)
- Firewall or security plugin IP allow-lists
- Caching plugin settings and absolute cache paths
- Third-party APIs that whitelist server IPs (payment, shipping, CRM)
- Server-level cron jobs and background workers
- Staging notices, “discourage search engines” setting copied from a staging site
If you reach the new host and something looks suspicious, a quick scan with our free WordPress Security Checker can catch obvious exposure.
10. WordPress Migration SEO Checklist: How to Protect Your Rankings
A hosting change with the same domain and the same URLs is the lowest-risk kind of site move. Google has a dedicated guide for exactly this scenario, where only the hosting changes and visitor-facing URLs do not, and it warns you to expect a temporary dip in crawl rate after launch that recovers over the next few days (Google: Changing your hosting). To make that true for your site:
Keep the same domain and URL structure
Do not change permalinks, switch from www to non-www, move to HTTPS, redesign or restructure content in the same window. If you must change URLs, treat it as a separate project with proper 301 redirects (Bing Webmaster Guidelines). One change at a time.
Check robots.txt and XML sitemap
- Open
/robots.txton the new server: it must not containDisallow: / - In Settings, Reading, make sure “Discourage search engines from indexing this site” is unchecked (a very common leftover when a copy came from staging)
- Confirm the XML sitemap loads and lists the same URLs
- Check the host did not add a blanket noindex header or password protection
Verify canonical URLs
View the page source of several pages and confirm rel="canonical" uses the production domain and HTTPS, not a staging or temporary hostname. Check your SEO plugin’s settings carried over.
Check Google Search Console
Make sure your Search Console verification still works. HTML file and meta tag methods travel with your files; a DNS TXT record must be copied if you changed nameservers. Use the URL Inspection tool to confirm Googlebot can reach and render the site on the new host.
Monitor indexing and crawl errors
For two to four weeks, watch the Pages (indexing) report, crawl stats, server errors (5xx), soft 404s and your organic traffic. Keep an eye on server response times too: a slower new server can hurt crawling. Keep the old host alive until old-server traffic is effectively gone, as Google recommends.
11. How to Verify Your WordPress Website After Migration
Test website speed and uptime
Compare page load times and server response before and after the move using the same tool and location, and start an uptime monitor immediately. Our WP Server Toolkit plugin watches server and uptime status, so you hear about a problem before your visitors do.
Check forms, login, and navigation
- Submit every contact, quote and newsletter form and confirm the email arrives
- Log in, log out and reset a password as a test user
- Click through menus, footer links, search and pagination
- Confirm comments, user registration and membership areas work
Test mobile responsiveness
Open the site on a real phone and a tablet (not just a resized desktop window). Check menus, sticky headers, checkout, and any cache or CDN-delivered layout differences.
Verify SSL and HTTPS
Confirm the padlock on every important template, that HTTP redirects to HTTPS with a single 301, that both www and non-www behave as before, and that no mixed-content warnings appear in the browser console.
Check database and media integrity
- Post, page, comment and user counts match the old site (
wp post list --format=countand similar) - Random sample of old posts: images and embedded media all load
- Media library shows thumbnails and the correct number of files
- Scheduled posts and scheduled actions are queued correctly
- Backups are scheduled and running on the new host
Final cleanup
- Remove the hosts-file entry from your computer.
- Delete leftover installer files, archives and SQL dumps from the web root.
- Raise the DNS TTL back to a normal value (for example 3600 seconds) once the site is stable.
- Keep the old host for at least 7 days (longer if you are unsure) and do not delete anything until you are confident.
- Cancel the old plan only after checking its refund and data-retention policy.
12. How Long Does WordPress Hosting Migration Take?
Actual transfer time depends on site size and server speed, but planning, testing and the DNS window matter more. These are realistic planning estimates:
| Site type | Hands-on work | Full cutover window |
|---|---|---|
| Small blog or brochure site (under 1 GB) | 30 to 90 minutes | Same day once TTL has been lowered |
| Medium business or membership site | 2 to 4 hours | Plan one evening for the freeze and switch |
| Large site or WooCommerce store | Half a day to several days incl. testing | Scheduled low-traffic window, extended monitoring |
| Multisite network or very large media library | Multiple days | Staged with extra rehearsal on a staging copy |
DNS is the unpredictable part. With a TTL already lowered to around 5 minutes, most visitors reach the new server within minutes. Without that preparation, the old record can stay cached much longer (see the next FAQ).
13. Frequently Asked Questions About WordPress Migration
Can I migrate WordPress without downtime?
Yes. Keep the old server live, build and test the copy on the new server using a hosts-file entry, sync the final database changes during a short freeze, then switch DNS. Visitors continue to be served by a working site the whole time.
Will changing hosting affect SEO rankings?
Not if the domain and URLs stay the same, the site is crawlable, and the new host is at least as fast and reliable. Google documents a temporary crawl-rate dip after a hosting change that recovers within days. The real risks are leftover noindex settings, a broken robots.txt, missing redirects, HTTPS problems and a slower server.
Can I migrate WordPress without changing my domain?
Yes, and that is the simplest scenario. Your domain, URLs and content stay the same. You only change where the domain’s DNS points. No search-replace is needed.
Do I need to reinstall WordPress on the new host?
Not for the manual method or Duplicator: you copy the existing files and database. Some plugins (such as All-in-One WP Migration) need a fresh blank WordPress install to import into. The WordPress handbook confirms you do not need to reinstall when moving to a new server.
How long should I keep my old hosting account?
At least seven days, longer for stores or sites with email on the old host. Cancel only after the old server’s logs show traffic has stopped and you have checked the provider’s refund policy.
What happens if DNS propagation takes 24 to 48 hours?
That is the worst case when records were cached with a long TTL. During that time some visitors reach the old server and others the new one. If both hold an identical site, nobody notices. That is exactly why you lower the TTL in advance, freeze content during the switch, and keep the old server running. For a store, put the old server into maintenance mode after the switch so orders are not placed on it.
Can I migrate a WordPress site without a plugin?
Yes. Copy the files with SFTP or rsync, export and import the database with phpMyAdmin or the command line, edit wp-config.php, test with a hosts file and switch DNS. It is the method most developers prefer for large or WooCommerce sites.
What about the emails on my domain?
Leave your MX records unchanged unless your email provider is moving as well. If you change nameservers, recreate MX, SPF, DKIM and DMARC records in the new DNS zone before switching.
Should I keep my CDN or Cloudflare during the move?
Yes, but update the origin server address at the right moment. With a proxy CDN you often change the origin IP in the CDN dashboard instead of the public DNS, and the hosts-file trick may not reach your origin. Test through the host’s temporary URL or the origin IP.
14. Conclusion: Successfully Move Your WordPress Site Without Downtime
A downtime-free WordPress migration is not about speed, it is about order of operations. Lower your TTL early, copy the site, prove it works on the new server before the world sees it, freeze and sync the final changes, and only then point DNS at the new host. Keep the old host running, watch both servers’ logs, and clean up leftovers once traffic has moved.
Your final checklist:
- Full off-server backup created and tested
- DNS TTL lowered 24 to 48 hours before the move
- New server matches PHP, MySQL and limits; SSL ready
- Files and database copied;
wp-config.phpupdated - Site tested through a hosts-file entry
- Content (and checkout) frozen, final database and uploads synced
- A record (and AAAA) updated; MX untouched
- Hosts-file entry removed; old and new logs monitored
- robots.txt, sitemap, canonicals and Search Console verified
- Old host kept at least seven days; leftover installers deleted
Once you are live on the new host, consider tightening security and monitoring: work through our WordPress security checklist, and set up uptime alerts with WP Server Toolkit. Moving a store? A fast, well-built WooCommerce theme makes the new server shine; browse the themes at aThemeArt when you are ready for the next upgrade.
Sources and further reading: Google Search Central: Changing your hosting · WordPress Developer Resources: Migrating WordPress · Cloudflare: DNS TTL · WooCommerce: HPOS CLI tools · InMotion Hosting: move WordPress to a new server (updated April 2026)